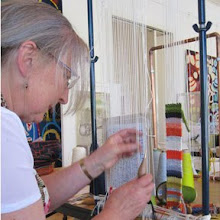
First of all a design is chosen after a lot of time thinking and planning what you would like to weave and also how successful you can envision the piece in woven tapestry. A tapestry is very different from a painting or a drawing as it will always have the basic structure of woven cloth. Because of this, woven lines and shapes are not always the same as a drawn or painted line. Angles in tapestry are created by stepping across warps, so a graduating angle will always have steps.
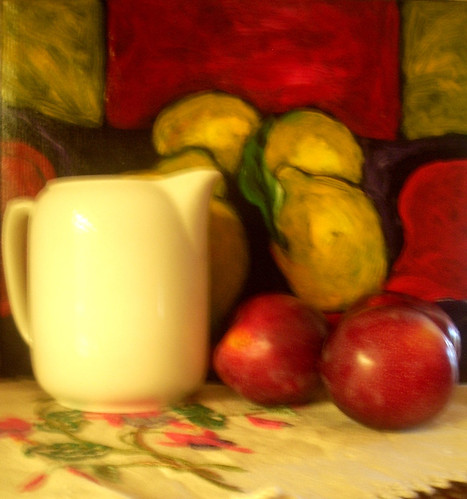
This is a photo of a still life that I set up in homage to my Mother. The painting in the background is a still life painting of mine. The jug belonged to my mother and was something that she often used. The three plums are from my garden and represent my mother’s three daughters. The embroidery that they all sit on was a gift, made for me by my Mother. This was the first time that I had woven a tapestry from a photo.
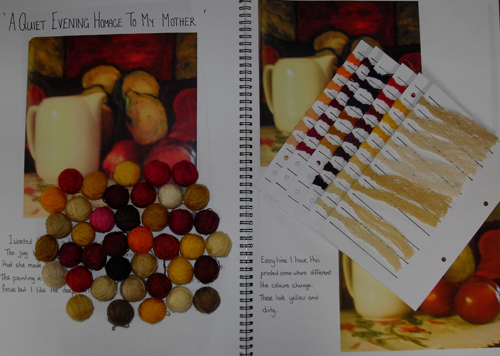
The digital photo was printed using several different printers. Due to this the colours were all different. After deciding which image I liked the most, 5 gm samples were dyed to try to achieve the correct colours to use in the tapestry. Records of the dye recipe used, enabled me to then go on to dye 100gm skeins of 2ply, 2/16’s 9 tpi, in the chosen colours.
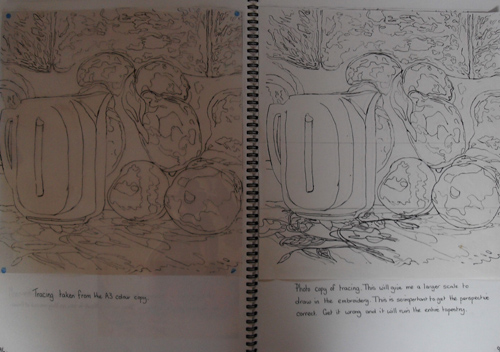
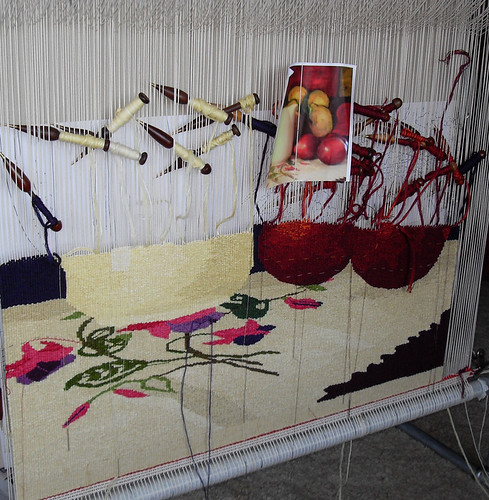
I took a tracing of the photo onto an overhead projector sheet to begin making the cartoon which will hang behind the tapestry to become my ‘map’ while weaving. This process was quite difficult as the photo is out of focus and I could not get a good drawing of the fuchsias’ in the embroidery. I enlarged the tracing to A3 and printed it off onto paper. This allowed me to draw in pencil to try to get the perspective right. This can make or break the tapestry as without the right perspective it will never look correct. It took several attempts before I was happy with the result. The A3 drawing was reduced to A4 using a photocopier, retraced onto an overhead projector sheet. The image was then projected onto paper that had been taped onto the wall and the outlines traced in pencil and then reworked over in texta. When you live in a rural area, these are the things that you have to do to get a large cartoon made. Unless you can manage to get the right proportions and print the cartoon in ‘tiles’ on your printer.
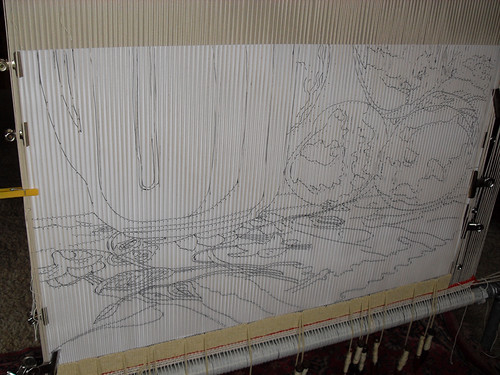
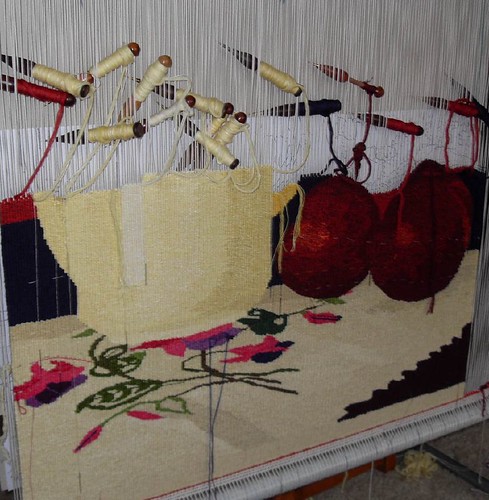
The large loom, made from galvanized iron plumbing pipe has been warped up with number 18 cotton seine twine and I have woven the hem that will be turned under when the tapestry is finished. For this tapestry I am using 10 strands of 2 ply wool and one strand of linen. I have part of the cartoon on a large piece of cardboard hanging behind the warps. When you warp a loom like this you create a natural open shed. To weave in the opposite shed you need to pull the back warps forward. Before you begin to ink on your design, a tread is placed in the closed shed to bring all of the warps on the loom together. The outline of the cartoon is drawn on to the warps and then painstakingly slowly each warp is rotated and inked around the mark, as the warps do move while you are weaving. This process is like map making, it tells you where you need to go.

Most of the time you can get a good feeling of how colours will sit together. Sometimes this works out, and other times it doesn’t. I felt that the shadow in the right hand side of the jug was weaving up too dark and wanted a softer graduation in the colours.
My mantra is “if in doubt, pull it out” so even thought it hurts it is always worth taking out something that you are not happy with rather than regret it later. Because the shape of the jug had straight sides I was able to unweave just the shape of the jug, without having to pull out other shapes in the tapestry as well.
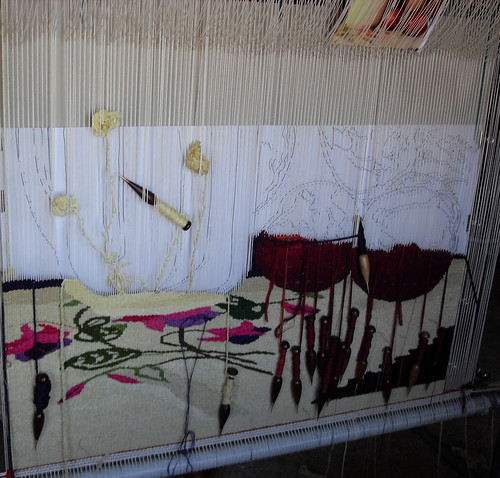
You can see here the jug has been rewoven in a slightly different colour; the design sits in view as a constant source of reference. The white thread that you can see across the tapestry is a marker showing me how much I have woven for the week.
The shapes are slowly being built up which gives you a sense of some kind of progress. I was not certain while I was weaving if the highlight in the jug was too pale and a severe contrast to the rest of the jug. After returning home from a two and a half week break and seeing it with fresh eyes, I decided to change the colour.
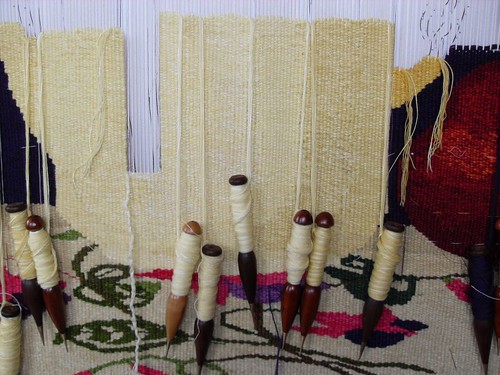
The highlight was easy to unweave as it was a completely straight up and down shape. Re sewing the slits back up was not difficult. Looking through the process now, it appears that I rewove more than I progressed! It is always worth the effort of correcting something that you are not happy with than living with regret later.
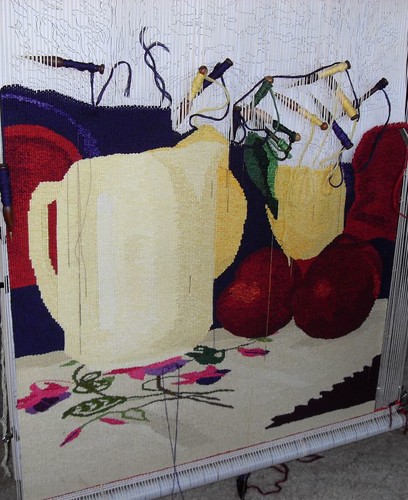
The shapes in the tapestry are beginning to take form and now I can see how the jug will sit against the background. This is the point where I felt certain that changing the tones in the jug was the right decision to make.
When I first began weaving tapestries, Marie Cook told me that the first half of any tapestry is always the slowest and most difficult. Building up the image, getting the correct colours and also a feel for what you are trying to achieve. Once the hard decisions are made, the process becomes more spontaneous and enjoyable!
My chair is getting higher and this is what I see as I look down while I weave. I am really enjoying the colours in this tapestry. A softer colour palette than my usual bright tones.
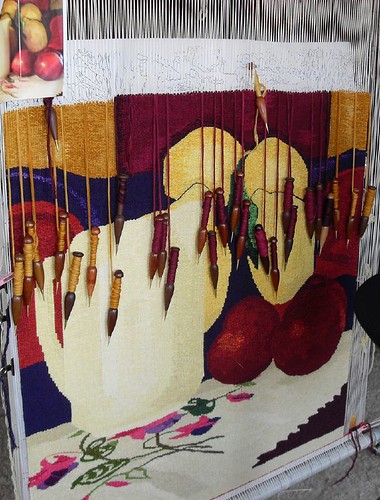
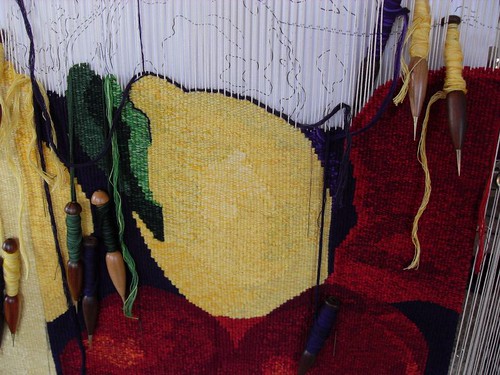
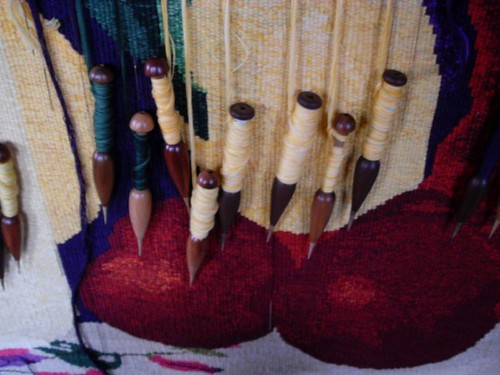
Almost there! The background is taking form and I can now see what the completed tapestry will look like. You can see how many bobbins I am using across the tapestry along with the needle and threads hanging down as I sew any slits in the tapestry as I weave. I would often use many more bobbins than this, but as I basically have only three shapes with graduating tones, so there are not as many.

The weaving is finally finished, the top hem has been woven and the threads hitched off so that the weaving is secure. It is a big celebration to finally finish a tapestry and cut it off from the loom!
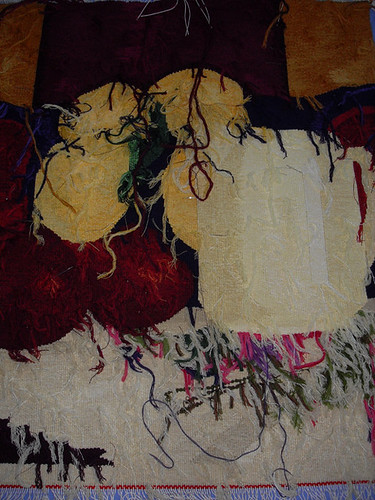
This is the back of the tapestry, there is a lot of finishing off to do still. The long threads on the back are cut shorted and any threads that are close to the edges are darned into the weaving.
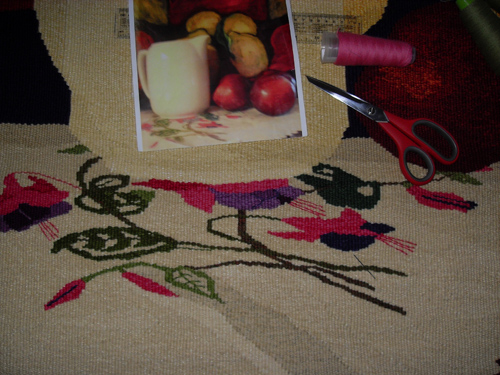
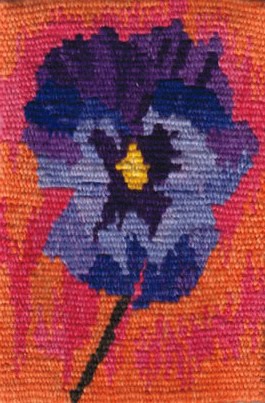
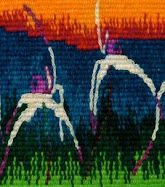
For this tapestry I was not certain if I could gain enough detail in one of the leaves on such a course warp setting so I decided to embroider it in later. The stamens in the flowers would have looked out of place if I had woven them in due to the stepping, so they were stitched on later as well.
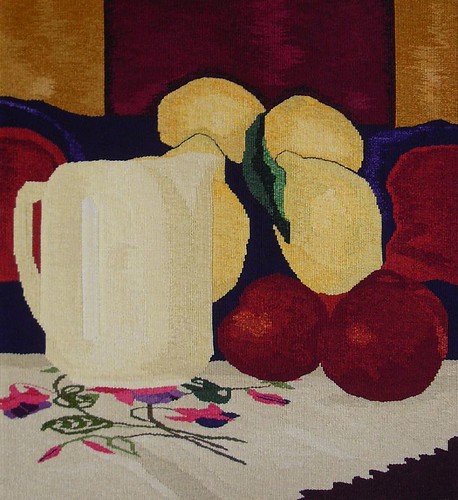
‘A Quiet Evening, Homage to my Mother'
H 109cm X W 100cmCotton warp, wool and linen weft.
2010
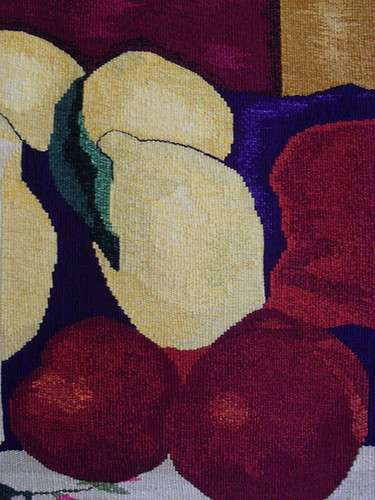
Detail
‘A Quiet Evening, Homage to my Mother'
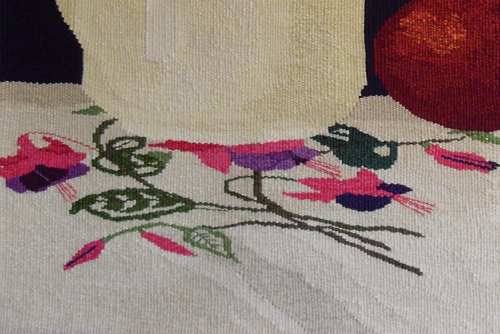
Detail